Upgrade Windows 10 or 11 Home to Professional

Are you looking to upgrade your edition of Windows? You're in the right place! Here's a simple and detailed guide on how to smoothly navigate the process. Even if you're not tech-savvy, this guide will help you achieve your goal with ease.
Step 1: Preparing Your System
Start by making sure you're familiar with where to adjust Windows settings:
On your computer, locate the Windows icon (it's usually at the bottom left corner of your screen).
Click on it, and from the menu that pops up, click on Settings. This will open up a window with a bunch of different options.
Navigate to Update & Security, it's one of the options in this menu.
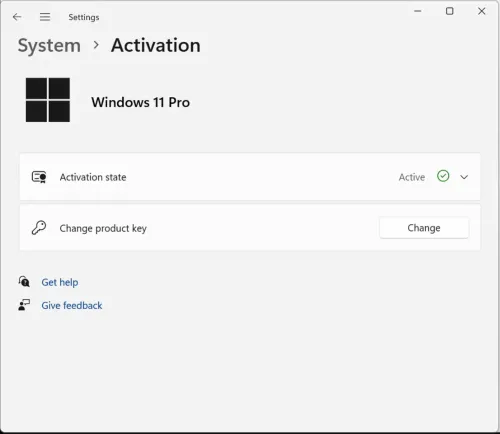
Once inside, look for and select Activation.
Step 2: Going Offline
Before we make any changes, it's crucial to ensure that your computer is offline. This means we'll temporarily disconnect from the internet:
Turn off your internet connection. This can usually be done by clicking on the WiFi or Ethernet icon in the bottom right corner and selecting "Disconnect" or "Turn off." This step is IMPORTANT because it ensures that the process goes smoothly.
Step 3: Initiating the Upgrade
Now, it's time to start the upgrading process:
Under the section labeled "Upgrade your edition of Windows" in Settings, find and click on "Change product key".
A new window will pop up asking for a product key. Enter the official Microsoft RTM code: “VK7JG-NPHTM-C97JM-9MPGT-3V66T” - you MUST use this code at this stage (not your purchased license). Now, while this license won't activate Windows for you, it will set things in motion for the upgrade to Pro.
Click Next and then select Start to confirm.
Step 4: Rebooting Your PC
Your computer will do some work in the background and then reboot:
Once the process completes, your PC should reboot automatically. This is your computer applying the changes you initiated.
After it starts up again, manually reboot it one more time to ensure everything is set up correctly. You can do this by clicking on the Windows icon at the bottom left, selecting the power icon, and then choosing Restart.
Step 5: Going Back Online and Finalizing the Upgrade
Now, we're nearing the finish line:
Reconnect to the internet by turning your internet connection back on.
Check your email to find the official Windows 10/11 Pro product key that was sent to you.
Head back to Settings > Update & Security > Activation.
Once again, click on "Change product key".
Paste or type in the new code you received in your email. This will activate the Windows 10/11 Pro license on your machine.
And there you have it! By following this guide, you've successfully upgraded your Windows edition. Enjoy the new features and benefits that come with Windows 10/11 Pro!
